Top Woodworking Tools And Tips To Get You Started In The Craft

The fine art of dealing with wood has so much to show. From the very skilled woodworkers who do woodworking for a source of revenue or the vacation woodworker who does it just for enjoyable, there is something for everyone. From discovering how to measure wood to understanding how tools run, this leisure activity really betters you as a person.

If you want to start woodworking as a hobby or a small business, always buy the highest quality tools that you can discover. While you may be able to find cheaper tools, they will end up breaking during your job. Invest the additional money and purchase a quality tool that will last a lifetime.

To get more information about how to make woodworking a lot more satisfying, continue reading this article and the pointers therein.

Top 10 Beginner Woodworking Tools

Get Quality Woodworking Tools

Woodworking Tools

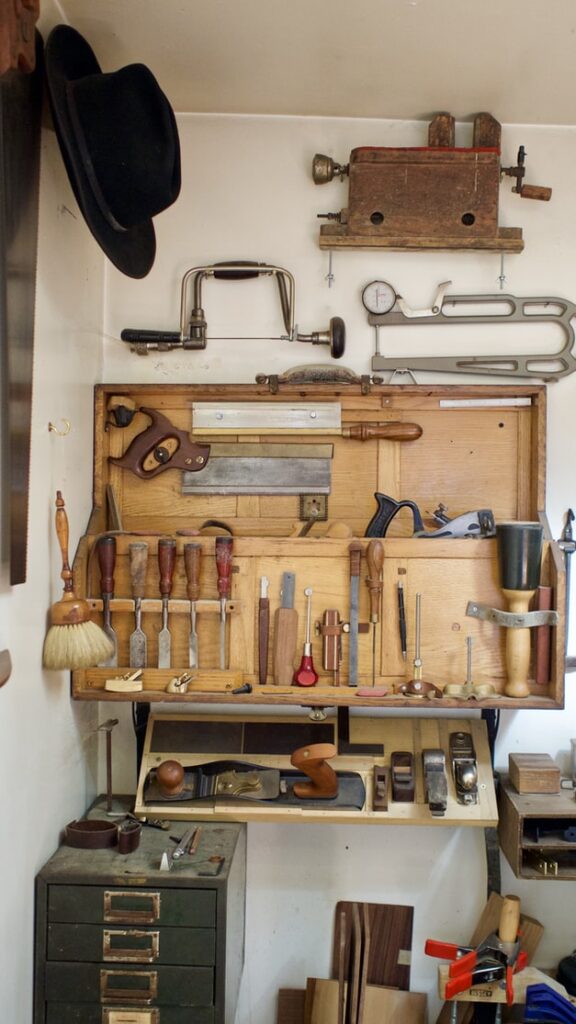
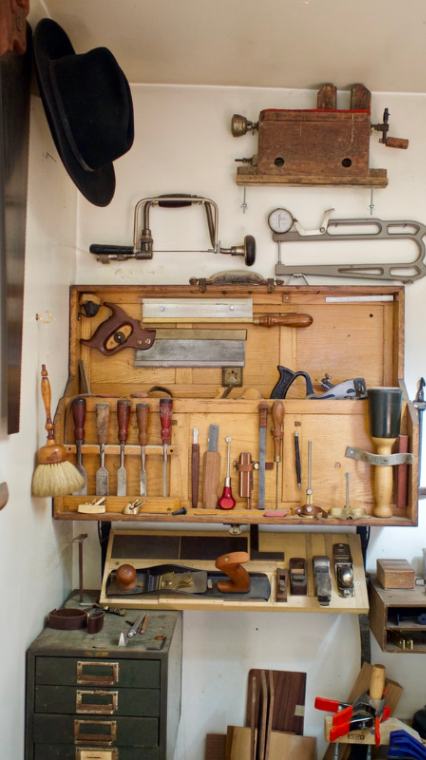
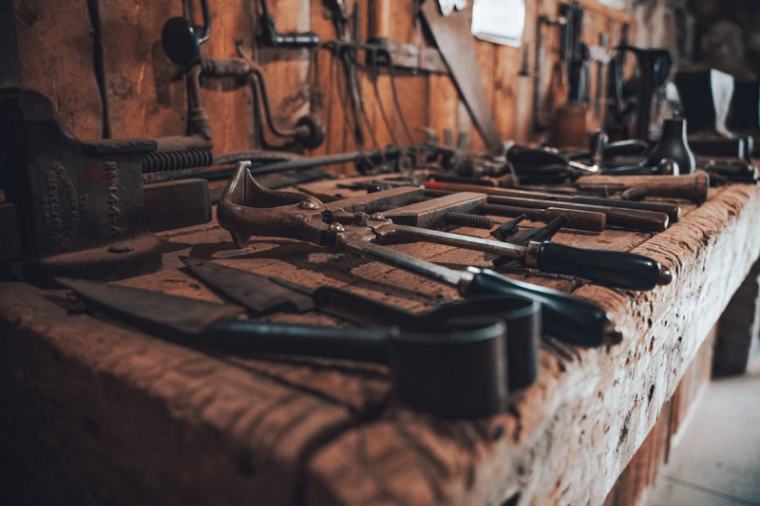
Keep all of your woodworking tools in a safe and dry place. You want to make certain that your tools are not in reach of children, along with that they will be safe from wetness and other components that can trigger them to degrade at high rate. Follow this guideline and your tools will last a long period of time. You may even want to take woodworking classes to help you get started.

If you find that there is rust on any of your woodworking tools there is a rather easy option. As long as the rust is just on surface area, all you need to do is utilize a pumice stone on the spot. Make certain to scrub gently, as being too rough can result in you damaging the tool itself.

Choose your woodworking tools and equipment carefully if you reside in a small space such as a house. You can still enjoy completing woodworking jobs, however might need to give up the 14-inch band saw. Pick tools that will do what you require but do not take up too much area.

Tips When Using Your New Table Saw

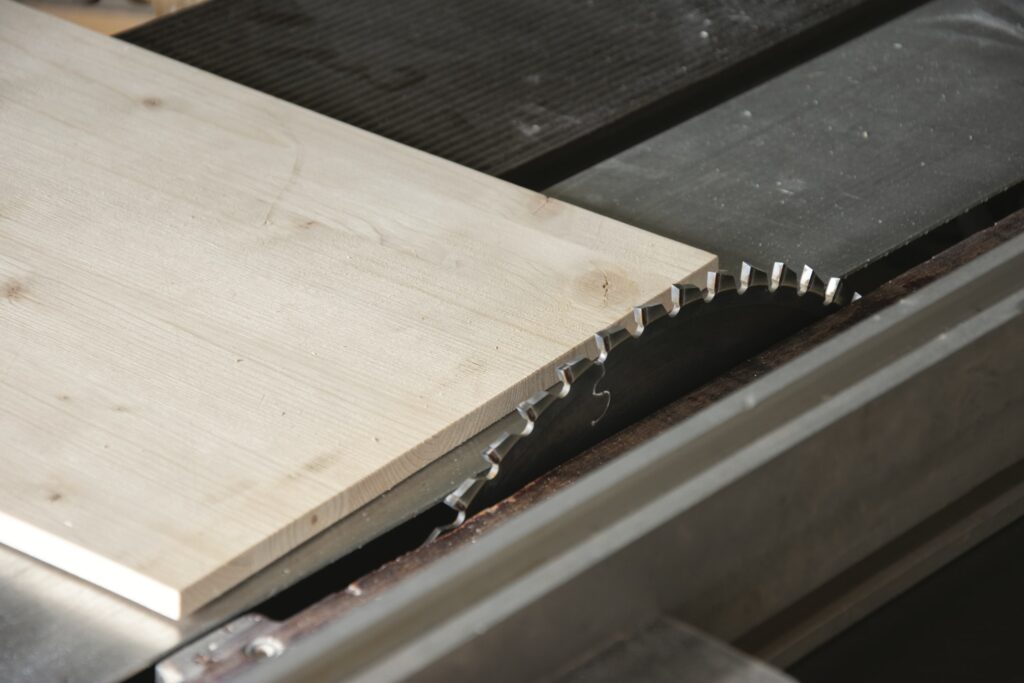
If you are trying new skills like using your new table saw, ensure that you practice on some wood that has no worth, like some scraps. You do not want to squander a costly piece of wood prior to you know exactly what you are doing. As soon as you have mastered your new abilities, you can move to a better piece of wood.

Usage stop blocks to your benefit for more precise work. When cutting a lot of pieces the same size, no matter how thoroughly you determine, you often discover small variations. Utilize a pre-cut stop block to make those measurements pinpoint accurate. Then the table saw will stop at simply the right length length.

Remember the quote, “Measure twice, cut Once.” When it comes to cutting wood, you always wish to ensure you have the best measurements before you start cutting. Otherwise, you will need to purchase more wood, which will cost you a lot of money. You can prevent this predicament by guaranteeing correct measurements.

Make sure you have the best sort of ear security when using your power tools. The machines utilized in woodworking produce great deals of sound. This can affect the quality of your hearing with time. You can get non reusable ear plugs or invest in a high quality set of headphones. Whatever you select, make sure to use them when operating loud power saws and other types of devices.

Using Sandpaper

When you begin sanding, constantly use a fresh sheet of sanding paper. Using fresh sandpaper permits you to get the sanding done more quickly. It is also simpler to sand with fresh sandpaper. Also, while sanding it is a great concept to inspect the sandpaper sometimes for blocking so you can change it as needed.

Do not apply strong pressure when sanding. If you push too hard, the surface area will be irregular. If you selected the correct sand paper, you need to not have to use tough pressure. Lightly sand with a circular movement and you’ll be fine.

Many experts will suggest sanding down and finishing the different pieces of the project before it is put together. This method makes finishing a lot easier and if the wood shrinks a little in the future, there will be no bare wood exposed. Nevertheless, it is important to keep the round off any surface areas that will be glued.

Using Stains And Paints

Stir, never ever shake spots and finishes before use. Over time, these settle, so blending is necessary. Shaking, however, adds bubbles and doesn’t constantly mix the stain or complete completely. Stirring mixes the products better by evenly mixing in any settlement that happened during storage. Stains and finishes that are not blended thoroughly will not use properly to the wood you’re staining and are at danger of looking blotchy.

Priming is a vital part of any painting task. This is especially real when painting untreated lumber. To assist you get the most stunning outcomes use 2 coats of guide to your incomplete wood. Gently sand in between the coats of primer. Then finish your project by applying two or three light coats of oil-based paint for a stunning surface.

Some Small Projects To Get Started With

Conserve some money and practice your woodworking abilities by constructing necessary items for your work space. Build some counters to work on and a work bench. Get innovative and you can make your work space even more arranged and effective given that you have the capability to organize the area.

When you approach a task, pick your purpose thoroughly. What will completion item be used for? Can you add energy to it so that it has a lot more utilizes? For example, when you build a desk consider also adding drawers and shelving to permit it to be an organized place to work.

Consider every part of your job, consisting of the small, voids. For instance, what can you add to the underside of your new desk to include more storage area? If you’re developing a bed, can you add some drawers beneath to put the linens into? Constantly keep your mind open to new ideas.

Continue Learning About Woodworking Tools

Always be on the lookout for ways to learn woodworking skills. If you know a woodworking specialists, ask them for their finest pointers. If you discover a magazine chock complete with ideas and suggestions, pick it up so that you can keep it in your archive. Even record TV shows like “This Old House” that have woodworking in them to give you some suggestions you my find there.

All great masters of their trade make the effort to inform themselves on as much as possible in regards to their skills and methods. You will be a much better carpenter now that you have actually taken the time to gain from this short article. Continue your reading so that you can produce remarkable outcomes.

How To Repair Furniture Like A Professional

Introduction to Furniture Repair

Welcome to our blog post on how to repair furniture like a professional! Whether you have a cherished antique piece that needs some tender loving care or simply want to breathe new life into your worn-out furniture, learning the art of furniture repair can save you time and money. 

In this comprehensive guide, we will walk you through the step-by-step process of repairing various types of damage, from scratches and dents to loose joints and broken legs. So grab your tools and get ready to unleash your inner DIY expert as we show you how to transform tired furniture into stunning pieces that will stand the test of time!

Tools and Materials You Will Need

Need furniture repair in Dallas TX? Look no further than our high-quality woodworking tools, designed to make your repairs easy and efficient. Get the job done right with our expertly crafted tools.198 characters
Woodworking-tools-to-repair-furniture-dallas-tx

Having the right tools and materials is essential when repairing furniture like a professional. Here are some of the key items you should have on hand:

1. Screwdrivers: A set of screwdrivers with different sizes and types of heads will come in handy for removing screws.

2. Wood glue: This adhesive is perfect for fixing loose joints or broken pieces of wood.

3. Sandpaper: Different grits of sandpaper can be used to smooth out rough surfaces or prepare them for refinishing.

4. Clamps: These are helpful for holding pieces together while the glue dries, ensuring a strong bond.

5. Putty knife: Use this tool to apply wood filler to any cracks or holes in your furniture.

6. Stain or paint: Depending on the finish you desire, choose either stain or paint that matches your piece.

7. Varnish or sealant: Applying varnish will protect your repaired furniture from future damage and give it a polished look.

Remember to also gather protective gear such as gloves, safety goggles, and dust masks before starting any repair project – safety first!

With these tools and materials at your disposal, you’ll be well-equipped to tackle various types of furniture repairs confidently! So, let’s roll up our sleeves and get started!

Common Types of Furniture Damage and How to Fix Them

Need furniture repair tools in Dallas? Look no further than our selection of high-quality woodworking tools. Trust us for all your furniture repair needs in TX.
Making legs to a sofa in Dallas

1. Scratches: One of the most common types of damage on furniture is scratches. Sc scratches can make your furniture look worn and aged, whether caused by pets, moving furniture, or everyday wear and tear. To fix minor scratches on wooden furniture, you can use a wax crayon that matches the color of the wood. Simply rub the crayon over the scratch until it’s filled in.

2. Water Stains: Accidental spills or condensation from glasses can leave unsightly water stains on your wooden furniture. Mix equal parts vinegar and olive oil in a bowl to remove water stains. Dip a soft cloth into the mixture and gently rub it onto the stain in circular motions until it fades away.

3. Loose Joints: Over time, joints on chairs, tables, and other pieces of furniture may become loose due to constant use or changes in humidity levels. To fix loose joints, you will need some woodworking glue and clamps. Apply glue to both joint surfaces and tightly clamp them together for at least 24 hours.

4. Broken Legs or Supports: If a leg or support on your furniture has broken off completely, don’t worry – it can be fixed! First, use sandpaper or a chisel if necessary to clean any debris from both surfaces. Then apply wood glue to both surfaces before securing them with screws or nails.

Remember that these are just some common types of damage you may encounter when repairing furniture at home! The specific methods used for repair will depend on factors such as material type (wood vs upholstery) as well as the severity of damage.

Step-by-Step Guide to Repairing Furniture

Step 1: Assess the Damage
Before you begin repairing your furniture, it’s important to assess the extent of the damage. Please be sure to look closely at any scratches, dents, or loose joints that need attention. This will help you determine what tools and materials you’ll need for the job.

Step 2: Gather Your Tools and Materials
You’ll need a few basic tools and materials to repair furniture like a pro. Some essentials include sandpaper in various grits, wood glue, clamps, putty knife, stain or paint (if necessary), and touch-up markers. Having these items on hand will make the process much smoother.

Step 3: Prep the Surface
Could you start by cleaning the damaged area with a mild soap and water solution? Once dry, use sandpaper to smooth out any rough edges or surfaces. This step is crucial as it helps create a clean surface for better glue adhesion or other repair materials.

Step 4: Repair Loose Joints
Applying wood glue can help restore stability if your furniture has loose joints. Apply a generous amount of adhesive to both surfaces that must be joined together. Then, use clamps to hold them while the glue dries completely.

Step 5: Fill Scratches and Dents
For minor scratches and dents on wooden surfaces, fillers can be used to even out imperfections. Choose an appropriate filler color that matches your furniture’s finish for seamless repairs. Apply according to product instructions using a putty knife and allow it to dry before sanding down excess material.

Step 6: Finish Up
Once all repairs have been made and dried properly, it’s time to finish up! Sand down any repaired areas until they are smooth with surrounding surfaces. If needed, apply stain or paint followed by a clear coat for added protection.

Repairing furniture may seem daunting initially, but following these step-by-step guidelines should give you the confidence to tackle the task like a pro. With a little time,

Tips for Maintaining Your Repaired Furniture

Once you have successfully repaired your furniture, it is important to take steps to maintain its newly restored condition. Proper maintenance can help prevent future damage and keep your furniture looking its best for years. Here are some tips to help you maintain your repaired furniture:

1. Keep it clean: Regularly dusting and cleaning your furniture will not only keep it looking fresh but also remove any dirt or debris that could potentially cause scratches or other damage.

2. Use coasters and placemats: To protect the surface of your repaired furniture from water rings, heat marks, or food stains, always use coasters and placemats when placing drinks or hot dishes on the surface.

3. Avoid direct sunlight: Prolonged exposure to sunlight can fade and damage the finish of your furniture. Consider using curtains or blinds to block out direct sunlight during peak hours.

4. Handle with care: Treat your repaired furniture gently by avoiding dragging or dropping heavy objects on it. Lift rather than drag items across surfaces to prevent scratching.

5. Repair minor issues promptly: If you notice any small chips, scratches, or loose screws on your repaired furniture, address them promptly before they worsen and require more extensive repairs.

6. Follow manufacturer’s instructions: If you used specific products during the repair process (such as wood polish), follow the manufacturer’s instructions for their ongoing use in order to preserve the integrity of the repair work.

By following these simple tips, you can ensure that your newly repaired furniture remains in top-notch condition for years to come!

DIY vs Hiring a Professional: Which Option is Best?

When it comes to repairing furniture, you may find yourself faced with a decision: should you tackle the job yourself or hire a professional? Both options have pros and cons, so it ultimately depends on your skill level, damage extent, and budget.

DIY furniture repair can be a rewarding experience for those who are handy and enjoy working with their hands. It saves you money on labor costs and gives you full control over the process. You can research techniques online, watch tutorials, and experiment until you achieve the desired results. However, DIY furniture repairs require time, patience, and expertise. If you need more confidence in your abilities or if the damage is extensive or complex (such as structural issues), it’s best to leave it to the professionals.

Hiring a professional furniture repair service offers several advantages. They have years of experience dealing with various types of damage and are equipped with specialized tools that may be limited to DIYers. Professionals also possess an eye for detail and can seamlessly restore your furniture to its former glory. Additionally, they often offer warranties on their workmanship, which provides peace of mind, knowing that any potential future issues will be addressed at no extra cost.

However, hiring professionals also comes at a price – literally! The cost of labor can significantly increase the overall expense compared to doing it yourself. Additionally, scheduling appointments may take time, depending on their availability.

When deciding between DIY and hiring a professional for furniture repair, consider factors such as your skills/experience level, time constraints, budget, and complexity/extent of damage.

DIY might be worth considering if you have confidence in your abilities and enjoy hands-on projects. However, in cases of extensive damage or a lack of expertise, it’s wise to invest in professional help. The choice ultimately rests upon weighing these factors against each other before making a well-informed decision.

Conclusion on Repairing Furniture

Transform your furniture repair projects with our high-quality woodworking tools in Dallas, TX. Get the job done right with our hand tools for furniture repair.
Furniture Repair in Dallas Texas with old woodworking tools.

Repairing furniture can be a rewarding and cost-effective way to restore the beauty and functionality of your favorite pieces. With the right tools, materials, and techniques, you can tackle common types of damage like scratches, dents, and loose joints like a professional.

Remember to start by assessing the damage and gathering all the necessary supplies before diving into the repair process. Take your time and follow each step carefully for the best results. And remember to maintain your repaired furniture properly to ensure its longevity.

While DIY repairs can be fulfilling, sometimes it’s best to leave complex or delicate repairs in the hands of professionals. They have the expertise and experience to handle intricate restoration projects requiring advanced skills or specialized equipment.

Whether you repair your furniture or hire a professional, always prioritize quality craftsmanship and attention to detail. Your repaired furniture will look great and stand the test of time with proper care.

So go ahead – grab those tools, put on some protective gear, and get ready to bring new life back into your beloved pieces! Happy repairing!

Remember: practice makes perfect when it comes to furniture repair! So feel free to take on smaller projects first before tackling larger ones. With time and experience under your belt, you’ll soon become an expert at rejuvenating old furniture like a pro!